![]()
If you need to replace the clock movement or parts of the movement, this section will help you to further disassemble your clock.
Note that your clock must be disassembled before proceeding.
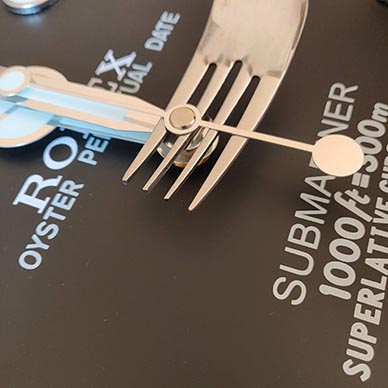
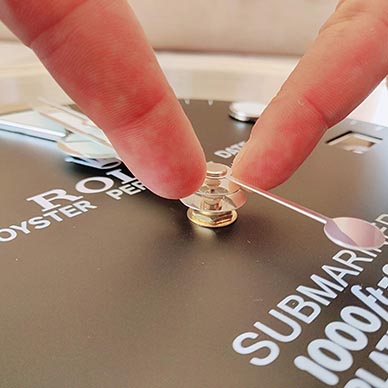
1. The first step is to remove the hands. Using a fork will allow you to apply equal pressure on both sides of the hand, and prevent the second hands from bending at the sides, so please use one! Then you can use your fingers for the other hands.
Tip: If the hand is stubborn, swing the fork gently back and forth instead of pulling it with force. Remember that the key is to be SOFT.

2. Once the hands are removed, you should see a 13mm nut. Use your tool of choice to remove it.
Tip: We recommend an adjustable spanner.

3. The movement will now be able to escape easily. It can be a small movement or a movement with a date disc, depending on the function of your clock.

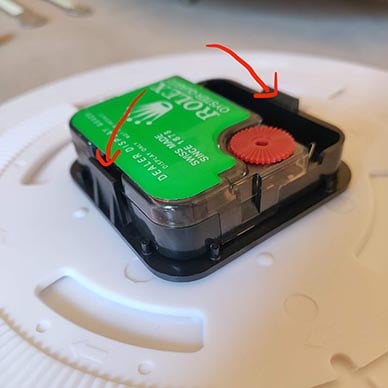
4. Unclip the clamps to allow the movement to be removed.
5. Well done, you have suceed to remove the movement, now you can add the replacement movement.
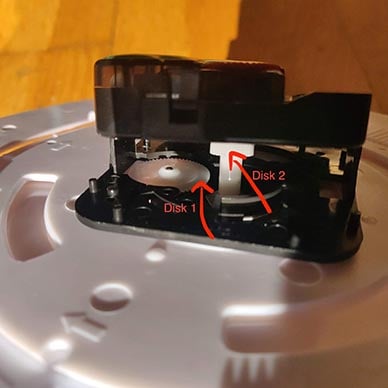
Make sure when you add the new movement that the 2 disks as the picture bellow, are well in place to let the date disk to turn. You can tighten the nut
6.Now we have placed the new movement in place, make sure it’s in the right direction, battery facing down when looking at the dial also, ensure the date is facing correctly the slot, if it is not the case you can adjust it holding the frame and rotating the movement. This will put the date in place as you can see in the picture bellow.

7. Replace the hands. Press down gently with your fingernails, and try to apply pressure as close to the center of the hands at possible.Tip: Try to install the hands pointing at the 12 o’clock position, this will make resetting your clock easier.
8. Replacing the second hand is simple, just push down gently on the top. and you’re done!
Head to the Resetting my Clock section before reassembly.
![]()