When you find out that your wall clock has stopped working and you could be late, you know how important time is. Your beloved wall clock may not function for many reasons, such as malfunctioning internal parts, a broken mechanism, or dead batteries. However, wall clock maintenance is more than just changing the batteries. While our hand-made Rolex Wall Clocks rarely, if ever, fail, you still want to make sure that the mechanism is well-oiled.
A good clock needs its mechanism to be changed every three to five years or sooner if something goes wrong. So, if your clock stopped working even after you changed the mechanism or the batteries, or if it was brand new, there could be one thing you overlooked. There is another way to keep your clock spotless, flawless, and operating at its peak performance. The answer is frequent and adequate lubrication.
Whether you own a Submariner wall clock, Daytona clock, Sky Dweller, etc., follow the steps below to get your clock back to working form.
How often should a clock be oiled?
A decent mechanical wall clock should ideally have its parts oiled every five years to ensure a smooth operation. By oiling the moving parts of a clock, we can stop rust from building and keep the clock in perfect working order without requiring significant repairs.
Which oil to use for your clock?
We recommend the usage of premium quality synthetic clock oil. The synthetic clock oil lasts longer, it greases the pivot effectively and is infused with anti-corrosives that will protect the moving parts of your clock. Do not use vegetable oil or even WD40 as they dry out faster and will render your clock non-functional.
How to oil a wall clock? – Step-by-Step guide
Opening the mechanism on your expensive clock and oiling the parts may seem difficult at first, but once you get the hang of it, you’ll be able to service your clock for a lot less money. You may prolong the life of your lovely clock by simply following the guidelines provided below!
Step 1: Take the clock movement out of the casing
You have to remove the case to reach the movement of the clock. Put the minute hand to the top of the hour hand before removing the hands. Once they are in position, loosen the nut securing the two hands and gently pull to remove the hands from the clock. It is necessary to unscrew the mounting screws at the back or beneath the base. The clock movement is all that remains and should be carefully lifted. If the face is still joined to the movement by pillars and tapered pins, you might need to detach it.
Step 2: Clean the Movement
The mechanism of the clock consists of two brass plates with gears positioned between them. The gears consist of a polished steel arbour with a brass wheel and pinion. The pivot, which creates the bearing between the plates and the steel pivot, is the polished end of the arbour.
The two brass plates that support the pivots in the centre have numerous holes called oil wells. These are often the sites where oil, and for the gears to function in unison, new oil needs to be introduced into them. The oil well’s cupped shape helps it hold oil efficiently. If the holes aren’t kept lubricated, corrosion and irreversible damage will occur. It is essential to wipe the dust and used oil from the clock before lubricating it. To remove the used oil, use a long, sharp peg-wood or an equivalent tool to pry off the dirty oil.
Do not disassemble the movement in its entirety. You must use a precise technique to reassemble the mechanism; otherwise, your clock will not function.
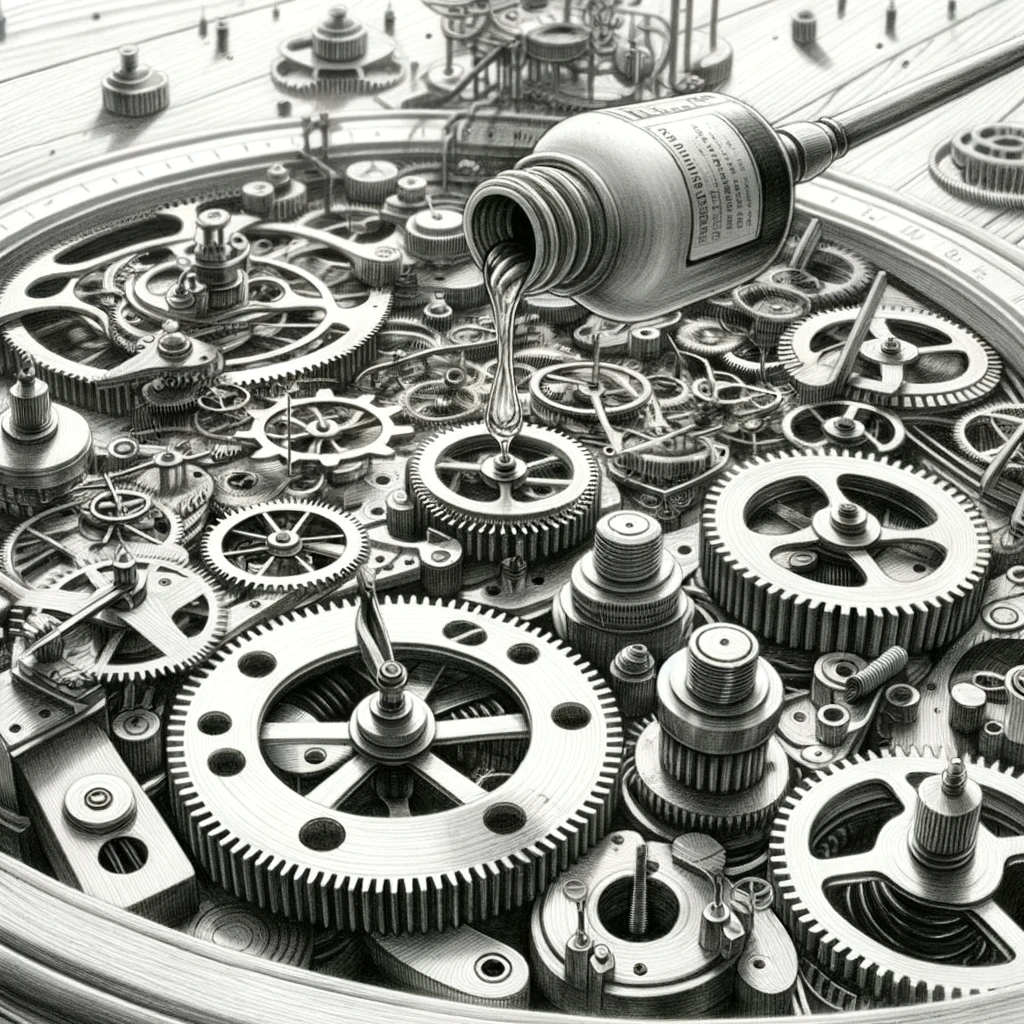
Step Three: Oil The brass backplate’s Cupped Holes
Turn the clock facedown. Using a clean oiling pin or steel pin, transfer a tiny amount of high-quality synthetic oil into a dish and insert a drop of it into the cupped hole. Refrain from using too much oil, as adding more than one drop will cause it to seep down the plates once assembled. Allow the oil to seep through and let the clock sit.
Lubricate all the oil wells in the same manner. Allow the oil to seep through and let the clock sit. Take care not to oil the pinions or gears, as this may cause dust to build at the bottom of the pinions and impede the gears’ ability to move. Once you have finished oiling the backplate’s oil wells, move on to oiling the front plate’s oil wells. Remember to oil the pulleys, the anchor escapement, the minute arbour, and the centre wheel.
Step 4: Put The Mechanism Back In Place
The difficult portion of the entire process is over once you have finished lightly oiling every oil well and mechanical component. Reinstall the mechanism as well as the hour and minute hands. Your clock ought to be back and functioning now! That wasn’t all that hard, was it? You can extend the life of your clock by repeating the procedure every five years!